
Land Rover Defender: Snow Chains
SNOW CHAINS - PART NUMBER: VPLEW0140
REMOVAL AND INSTALLATION
WARNING: Accessories which are not correctly installed can be dangerous. Read the instructions carefully prior to installation. Comply with instructions at all times. If in doubt, contact your nearest approved retailer.
NOTE: This procedure contains some variation in the illustrations depending on the vehicle specification, but the essential information is always correct.
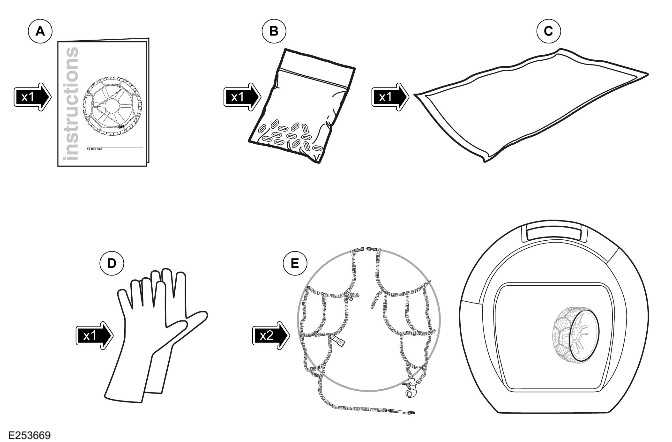
INSTALLATION
1.
CAUTION: Snow chains must be installed to the rear tires only.
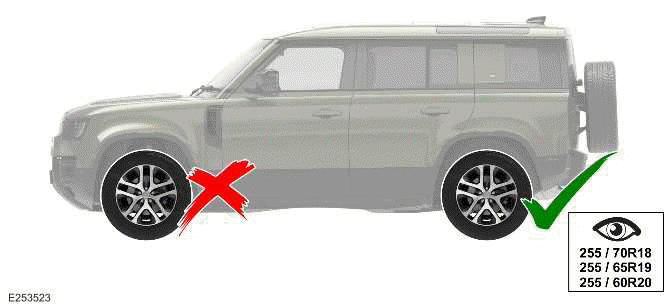
The snow chain is only applicable to the tire sizes as illustrated.
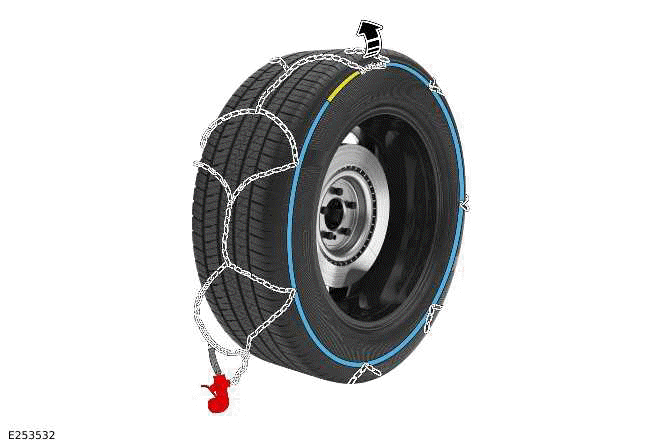
2.
NOTE: Yellow end to be positioned as illustrated.
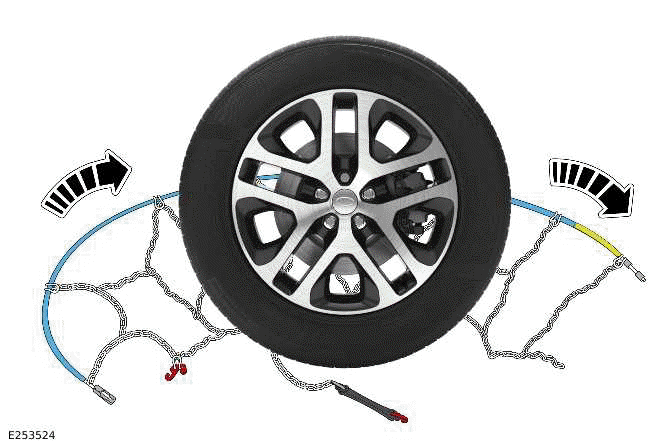
Place the snow chain on the ground. Move the snow chain around the wheel as illustrated.
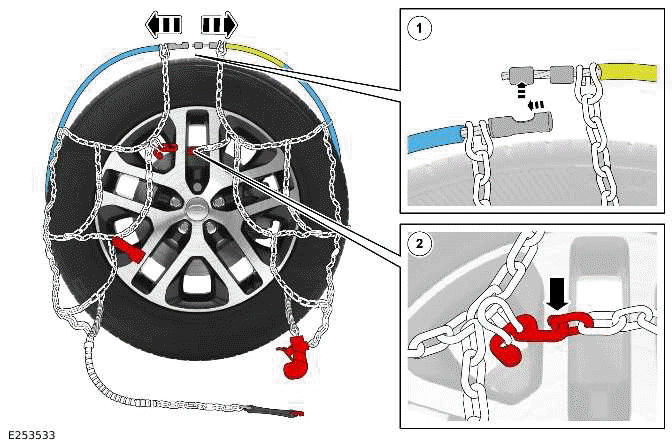
3.
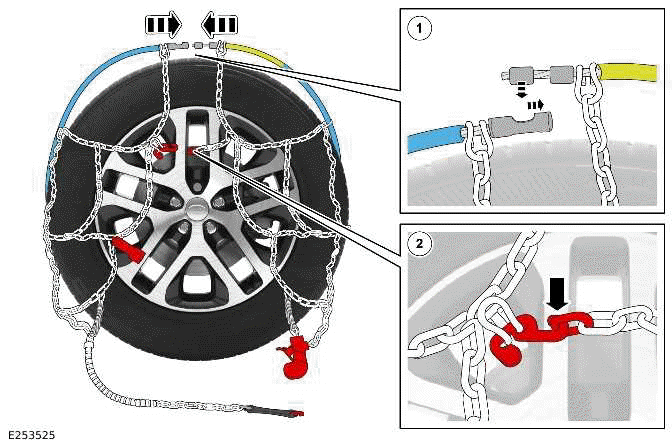
Install the snow chain.
- Connect the yellow and the blue ends of the snow chain wire together.
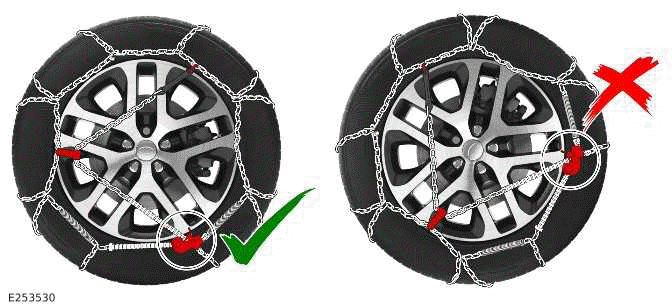
- Connect the red chain hook and the red chain link as illustrated.
4.
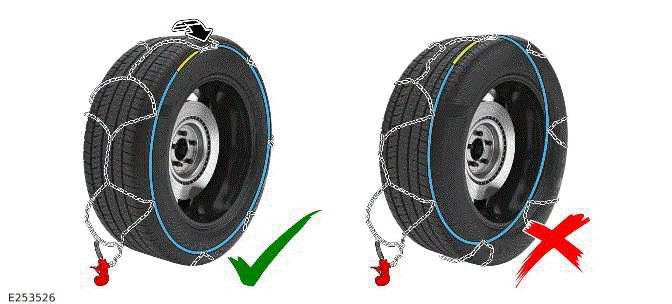
Pull the top of the snow chain over and behind the wheel as illustrated.
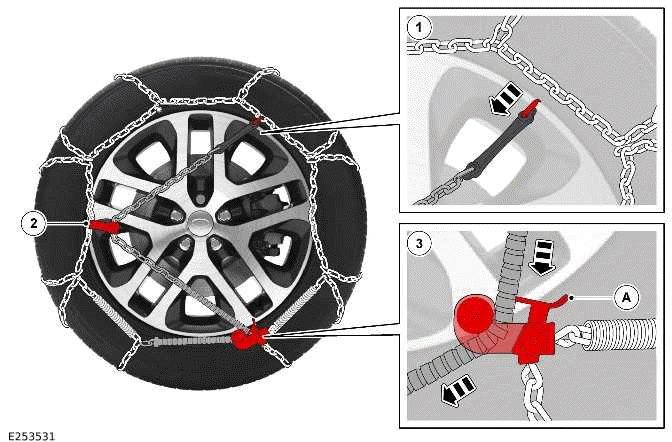
5.
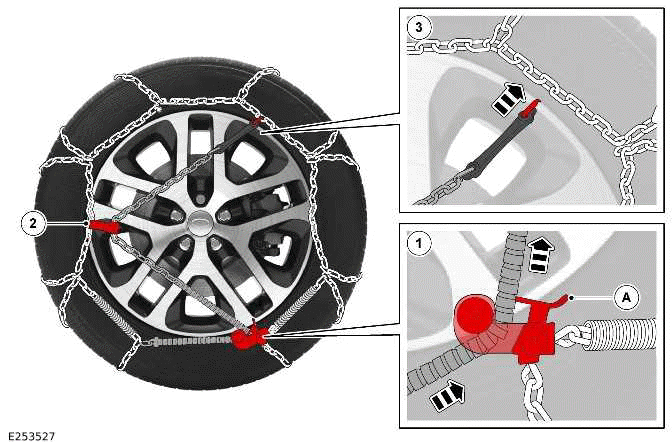
Install the snow chain.
- Pull the chain through the pulley while pulling back the lever (A).
- Feed the chain through the chain holder.
- Attach the snow chain as illustrated.
6.
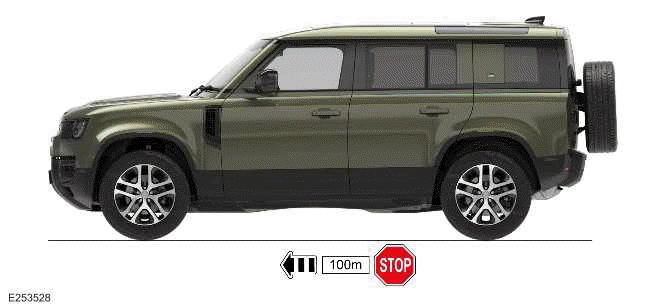
Drive for a short distance (about 100 m) and check the snow chains again. Adjust if necessary.
7.
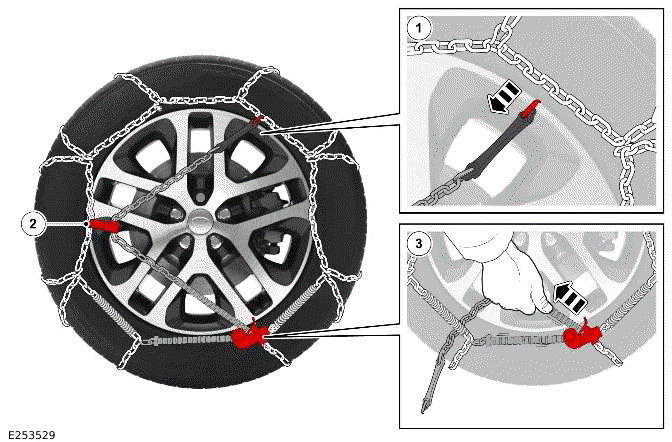
Adjust the snow chains.
- Disconnect the snow chain as illustrated.
- Remove the snow chain from the holder.
- Pull on the snow chain to tighten the slack. Attach the snow chain as shown in install step 5.
REMOVAL
1.
When removing the snow chain make sure the pulley is at the bottom of the wheel as illustrated.
2.
Remove the snow chain.
- Disconnect the snow chain as illustrated.
- Remove the snow chain from the holder.
- Pull the snow chain through the pulley while pulling back the lever (A).
3.
Pull the snow chain back over from the rear to the front of the wheel.
4.
Remove the snow chain.
- Disconnect the yellow and blue ends of the snow chain wire.
- Disconnect the red chain hook and the red chain link as illustrated. Remove the chain.
READ NEXT:
 Suspension System - General Information
SPECIFICATIONS
* Measurement taken with vehicle at unladen weight
Wheel Alignment Specification - Front - Air Spring Suspension - Non
Plug-in Hybrid Electric Vehicle (PHEV)
NOTE:
All figures are wit
SEE MORE:
Seats - [+] 6 Seat Configuration - Control Diagram
CONTROL DIAGRAM - 1 OF 6 - MANUAL SEAT ADJUSTMENT
A = HARDWIRED.
Seat switchpack
Seat backrest recline motor
Air reservoir valve block
CONTROL DIAGRAM - 2 OF 6 - DRIVER SEAT ADJUSTMENT WITH SEAT MEMORY
NOTE:
Vehicle with 3 doors is shown, vehicle with 5 doors is similar.
A = HARDWIRED: O = LI
Rear Driveshaft
REMOVAL AND INSTALLATION
PART(S)
REMOVAL
NOTE:
This procedure contains some variation in the illustrations depending
on the vehicle specification, but the
essential information is always correct.
This procedure contains illustrations showing certain components
removed to provide extra clari
