
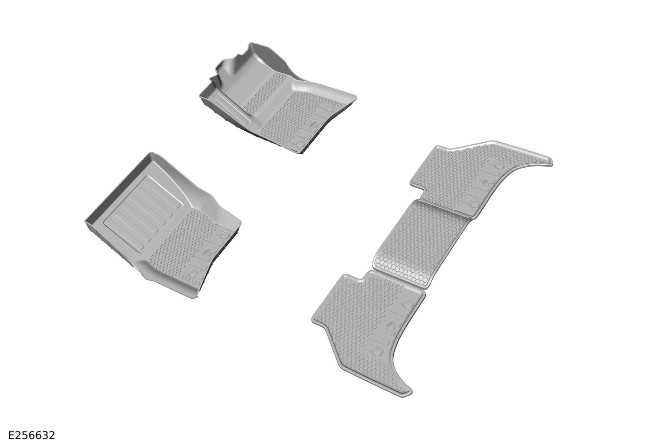
Land Rover Defender: Floor Mats
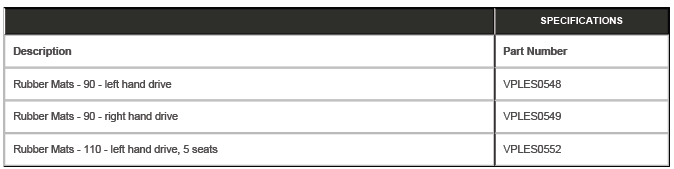
FLOOR MATS - PART NUMBER: 90: VPLES0548, VPLES0549, VPLES0554, VPLES0555 110: VPLES0550, VPLES0552, VPLES0551, VPLES0553, VPLES0556, VPLES0557, VPLES0558, VPLES0559
REMOVAL AND INSTALLATION
WARNING: Accessories which are not correctly installed can be dangerous. Read the instructions carefully prior to installation. Comply with instructions at all times. If in doubt, contact your nearest approved retailer.
NOTES:
- This procedure contains some variation in the illustrations depending on the vehicle specification, but the essential information is always correct.
- This procedure contains illustrations showing certain components removed to provide extra clarity.
- This procedure contains illustrations for left hand drive vehicles, right hand drive vehicles are similar.
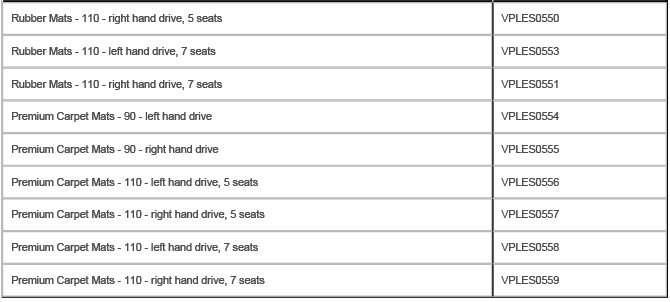
NOTE: Rubber mats for left hand drive, 5 seat vehicles with 110 wheelbase, use VPLES0552.
NOTE: Rubber mats for right hand drive, 5 seat vehicles with 110 wheelbase, use VPLES0550.

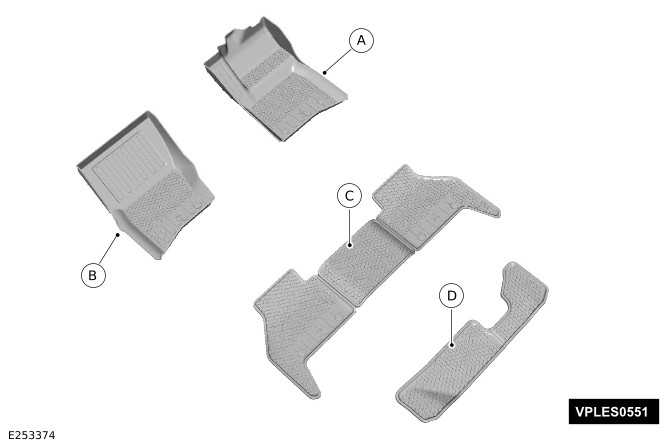
NOTE: Rubber mats for right hand drive, 7 seat vehicles with 110 wheelbase, use VPLES0551.
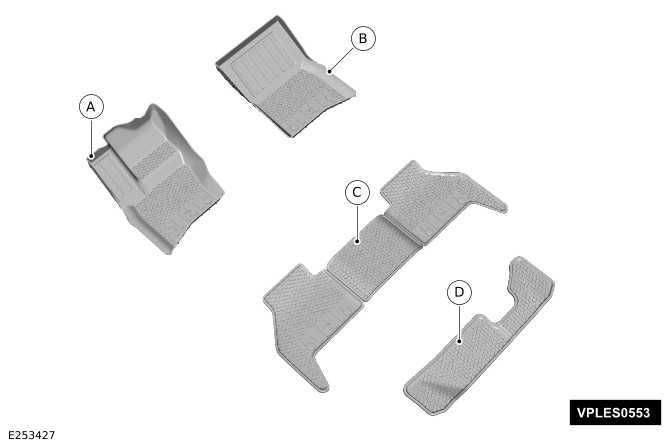
NOTE: Rubber mats for left hand drive, 7 seat vehicles with 110 wheelbase, use VPLES0553.
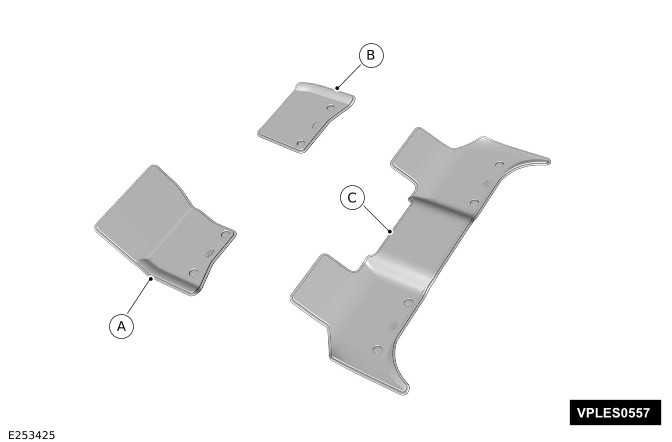
NOTE: Premium carpet mats for right hand drive, 5 seat vehicles with 110 wheelbase, use VPLES0557.
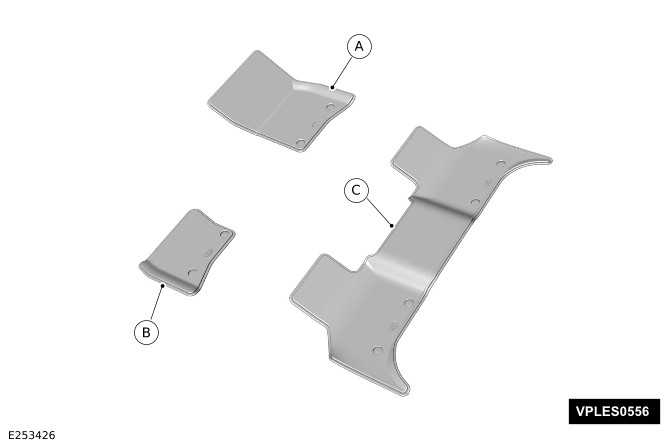
NOTE: Premium carpet mats for left hand drive, 5 seat vehicles with 110 wheelbase, use VPLES0556.
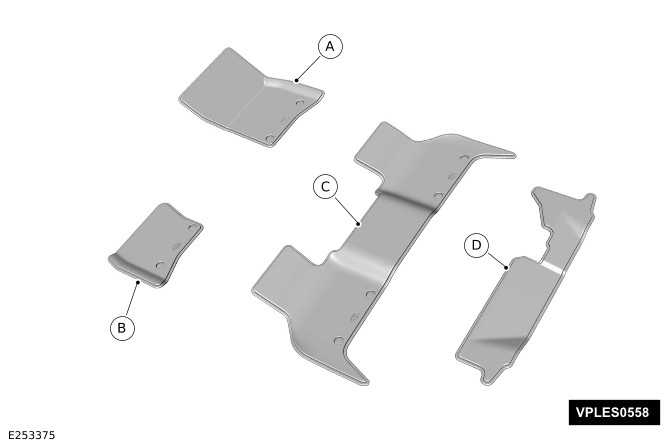
NOTE: Premium carpet mats for left hand drive, 7 seat vehicles with 110 wheelbase, use VPLES0558.
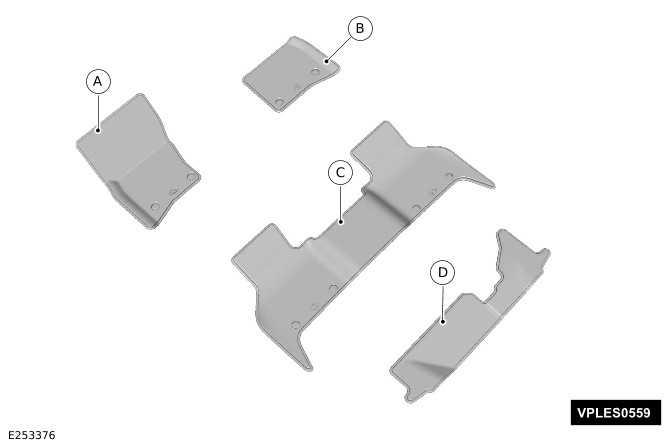
NOTE: Premium carpet mats for right hand drive, 7 seat vehicles with 110 wheelbase, use VPLES0559.
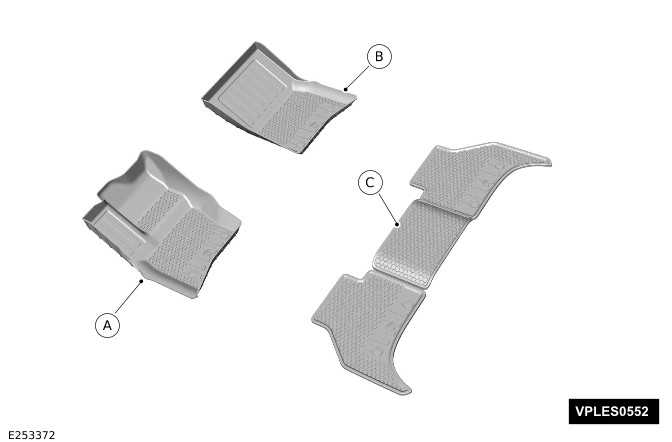
INSTALLATION
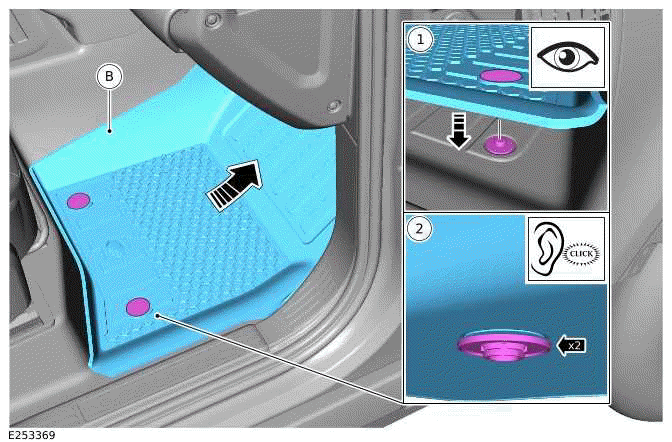
1.
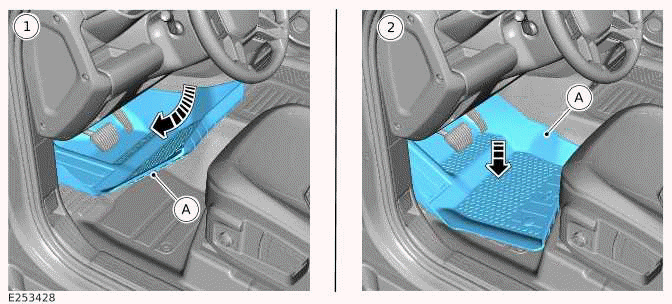
Carefully install the front row driver floor mat.
- Carefully feed the front row driver floor mat behind the foot pedals.
- Position the front row driver floor mat.
2.
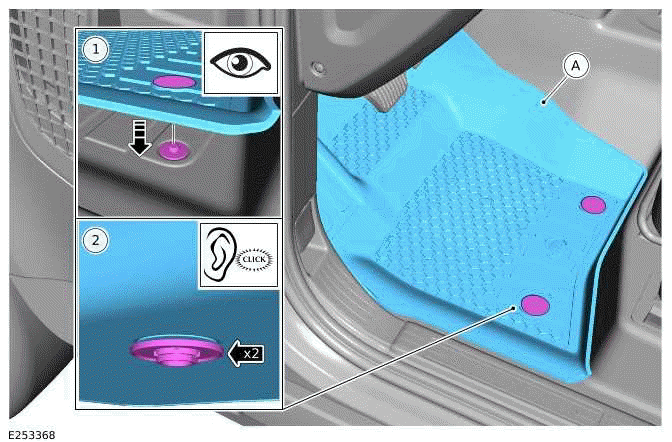
Secure the front row driver floor mat.
3.
Install the front row passenger floor mat.
4.
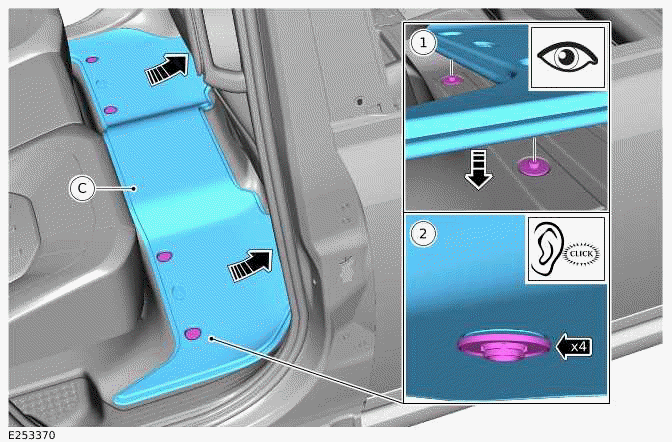
Install the second row seat floor mat.
5.
NOTE: For vehicles with third row seating.

Install the third row seat floor mat.
READ NEXT:
 Seat Backpack
SEAT BACKPACK - PART NUMBER: VPLES0573
REMOVAL AND INSTALLATION
WARNING:
Accessories which are not correctly installed can be dangerous. Read the
instructions carefully prior to
installation. Comply
Ski Bag
SKI BAG - 110, PART NUMBER: VPLGS0166
REMOVAL AND INSTALLATION
WARNING:
Accessories which are not correctly installed can be dangerous. Read the
instructions carefully prior to
installation. Comply w
Front Treadplates
FRONT TREADPLATES - PART NUMBER: 90:
VPLES0575PVJ, VPLES0595LAA, LR131474,
LR131466, LR131475, LR131467 110: VPLES0576PVJ,
VPLES0596LAA, LR131470, LR141462, LR131471,
LR131463
REMOVAL AND INSTALLATION
SEE MORE:
Vehicle labels
LABEL LOCATIONS
Warning labels attached to the
vehicle bearing this symbol
mean: Do not touch or adjust
components until having read
the relevant instructions in the
handbook.
Labels showing this symbol
indicate that the ignition system
utilises very high voltages. Do
not touch any ignition
componen
Remote Control Electric Winch
REMOTE CONTROL ELECTRIC WINCH - PART
NUMBER: VPLEP0426
REMOVAL AND INSTALLATION
WARNING:
Accessories which are not correctly installed can be dangerous. Read the
instructions carefully prior to
installation. Comply with instructions at all times. If in doubt, contact your
nearest approved retailer
