
Land Rover Defender: Engine Oil Vacuum Draining and Filling
GENERAL PROCEDURES
SPECIAL TOOL(S)
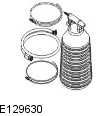
JLR-303-1644
Oil Extraction Kit
PART(S)

DRAINING
WARNINGS:
- The spilling of hot oil is unavoidable during this procedure, care must be taken to prevent scalding.
- Be prepared to collect escaping oil.
CAUTION: Before disconnecting any components, make sure the area is clean and free from foreign material. When disconnected all openings must be sealed.
NOTES:
- This procedure contains some variation in the illustrations depending on the vehicle specification, but the essential information is always correct.
- This procedure contains illustrations showing certain components removed to provide extra clarity.
- Engine oil vacuum draining and filling is the recommended procedure for engine oil change during a scheduled service. Scheduled service labour times are calculated using this method.
1.
CAUTION: Make sure the engine is warm.
Start and run the engine at idle until the normal operating temperature is reached.
2. Remove the engine cover.
3.
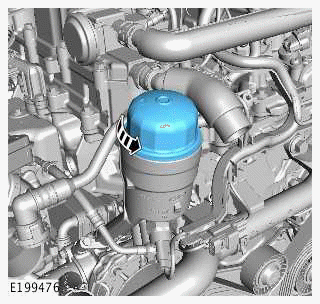
Loosen the oil filter element cap 4 complete turns.
4.
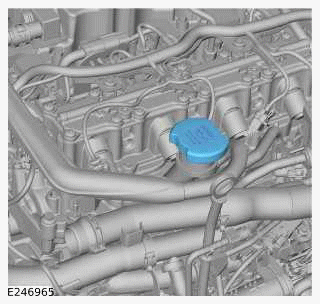
Remove the oil filler cap.
5.
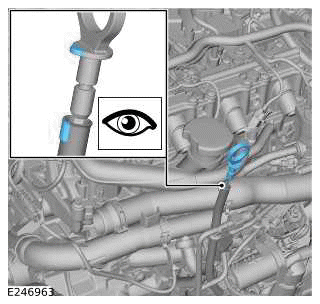
Remove the oil level gauge.
6.
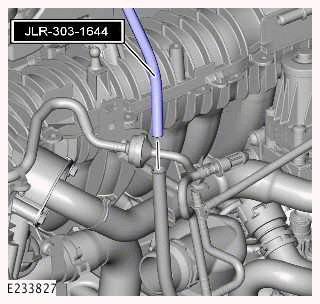
- Install the special tool.
Special Tool(s): JLR-303-1644
- Use the special tool to drain the oil.
7. Remove the special tool.
Special Tool(s): JLR-303-1644
8.

Remove the oil filter element cap.
9.
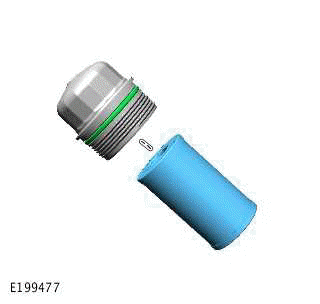
- Remove and discard the oil filter element.
- Remove and discard the O-ring seal.
FILLING
1.

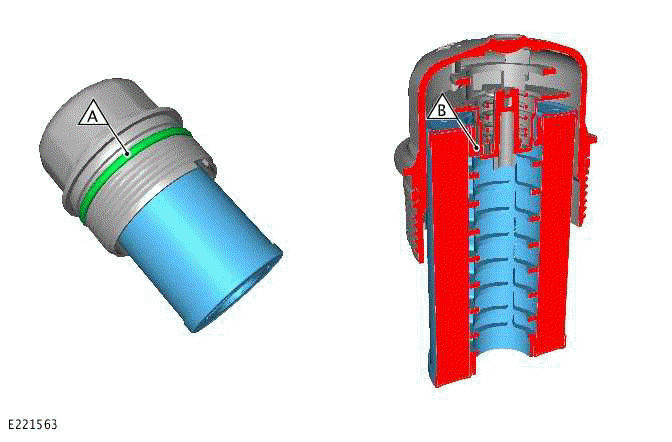
Before installing the oil filter element and cap, check the bypass valve (A) is installed and correctly attached to the locating tabs (B).
2.
- Install a new O-ring seal.
Renew Part: Oil filter O-ring seal(s) Quantity: 1.
- Lubricate the oil filter O-ring seal (A) with clean oil and install the
oil filter element into the cap. Make
sure the oil filter element is pushed correctly on to the bypass valve
inside the oil filter element cap
(B).
Renew Part: Oil filter Quantity: 1.
3. Install and tighten the oil filter element cap.
Torque: 28Nm
4. Fill the engine with the recommended oil to the correct level.
5. Install the oil filler cap.
6.
CAUTION: Make sure that the component is correctly installed.

Check the engine oil level.
7.
- Start the engine and allow to idle for 2 minutes.
- Check for leaks.
- Stop the engine.
8. Install the engine cover.
READ NEXT:
 Crankshaft Pulley - Ingenium I4 2.0l Petrol
REMOVAL AND INSTALLATION
SPECIAL TOOL(S)
JLR-303-1628
Remover/Installer, Front Crankshaft Seal
JLR-303-1630
Locking Tool, Crankshaft Pulley
PART(S)
REMOVAL
NOTE:
This procedure contains some vari
Crankshaft Rear Seal - Ingenium I4 2.0l Petrol
REMOVAL AND INSTALLATION
SPECIAL TOOL(S)
100-012
Slide Hammer
JLR-303-1674
Installer - Rear Crankshaft Oil Seal
JLR-303-1674A
Installer - Rear Crankshaft Oil Seal
JLR-303-1712
Remover, Rear Cranks
Camshafts - Engine Set
REMOVAL AND INSTALLATION
REMOVAL
NOTE:
This procedure contains some variation in the illustrations depending
on the vehicle specification, but the
essential information is always correct.
This p
SEE MORE:
Cruise Control Module Adjustment
GENERAL PROCEDURES
GENERAL EQUIPMENT
CHECK
WARNING:
This procedure requires road testing the vehicle. Make sure to follow the local
highway code during the road
test.
1.
The Cruise Control Module (CCM) can not be adjusted mechanically.
Use the Jaguar Land Rover approved diagnostic equipment to
Electric Vehicle Safety Rules (Section 3-4)
SECTION 3 - SAFETY PRECAUTIONS FOR WORK ON OR NEAR ELECTRIC VEHICLES
3.1 Use Safety Equipment and Wearing of Personal Protective Equipment (PPE)
Where any work under these EV Safety Rules and related documents and
procedures takes place, appropriate safety
equipment and protective clothing of an Ap
