
Land Rover Defender: Engine - Installation
ENGINE - INGENIUM I4 2.0L PETROL/INGENIUM I4 2.0L PETROL - PHEV
INSTALLATION
SPECIAL TOOL(S)
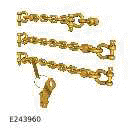
JLR-303-1633-01
Engine Lifting Kit
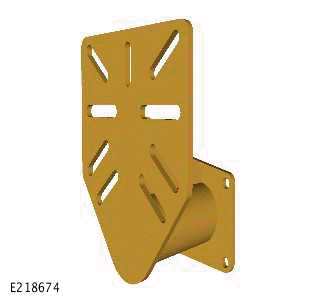
JLR-303-1673
Engine stand adaptor
GENERAL EQUIPMENT

PART(S)

WARNING: Be prepared to collect escaping engine coolant.
CAUTION:
- Be prepared to collect escaping fuel.
- Be prepared to collect escaping oil.
- Before disconnecting any components, make sure the area is clean and free from foreign material. When disconnected all openings must be sealed.
NOTE:
- This procedure contains some variation in the illustrations depending on the vehicle specification, but the essential information is always correct.
- This procedure contains illustrations showing certain components removed to provide extra clarity.
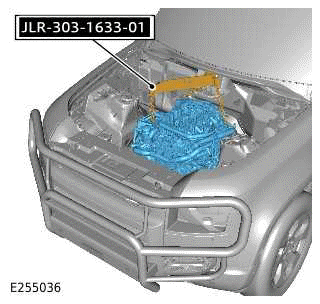
1.

- Install the special tool.
Special Tool(s): JLR-303-1633-01
- Install and tighten the 2 bolts.
Torque: 25Nm
2.
WARNING: This step requires the aid of another technician.
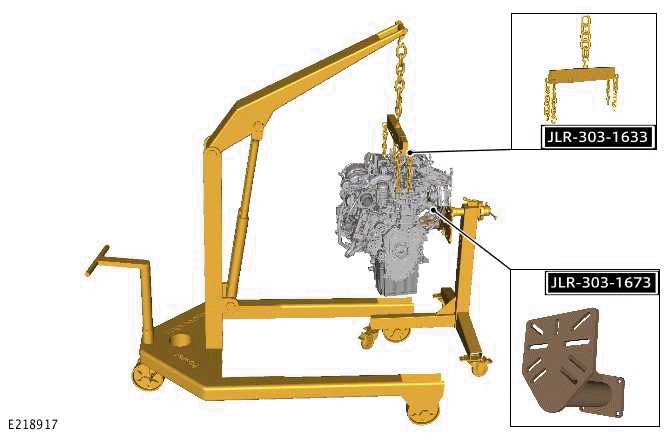
- Install the special tool.
Special Tool(s): JLR-303-1633-01
- Install a suitable hydraulic jib crane to the special tools as
illustrated.
General Equipment: Hydraulic jib crane
- Remove the engine from the engine stand.
General Equipment: Engine stand
3.
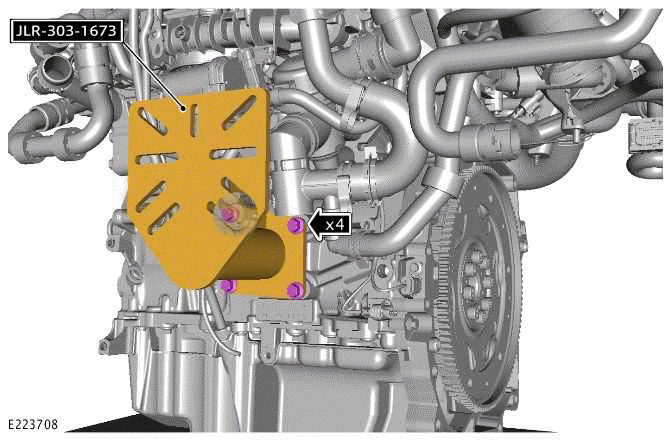
- Remove the 4 bolts.
- Remove the special tool.
Special Tool(s): JLR-303-1673
4.
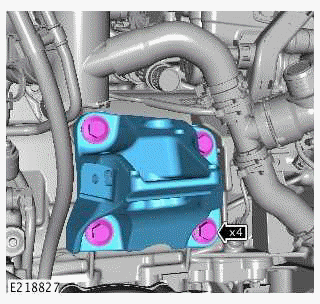
- Install the bracket.
- Install and tighten the 4 bolts.
Torque: 63Nm
5.
- Use the special tool and a suitable hydraulic jib crane to carefully install the engine.
- Remove the hydraulic jib crane.
General Equipment: Hydraulic jib crane
- Remove the special tool.
Special Tool(s): JLR-303-1633-01
6.
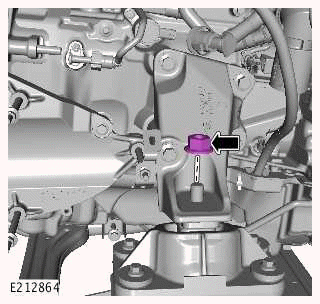
Install and tighten the new nut.
Renew Part: Engine mount nut(s) Quantity: 1.
Torque: 110Nm
7.
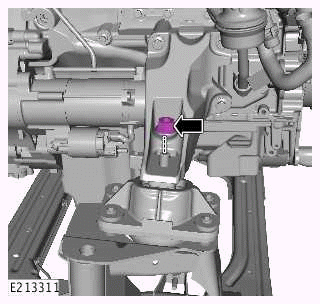
Install and tighten the new nut.
Renew Part: Engine mount nut(s) Quantity: 1.
Torque: 110Nm
8.

Remove the 2 bolts.
Remove the special tool.
Special Tool(s): JLR-303-1633-01
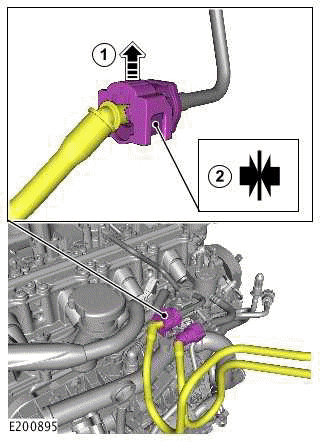
9.
- Connect the 2 electrical connectors.
- Tighten the bolt.
Torque: 7Nm
- Install the wiring harness clip.
- Install the wiring harness grommet.
10.
- Install the closing panel.
- Install and tighten the 2 bolts.
Torque: 9Nm
11.
- Connect the Low Pressure (LP) fuel line.
- Connect the breather pipe.
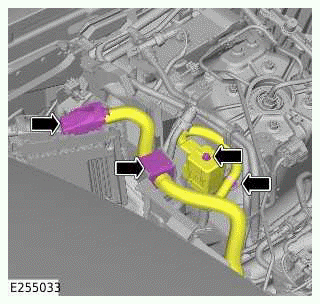
12.
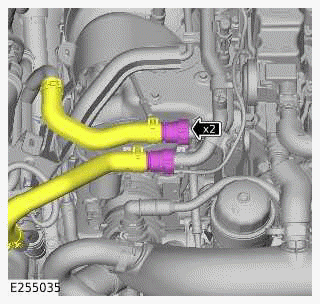
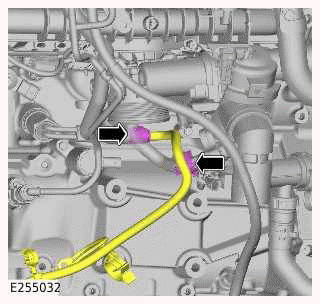
Connect the 2 engine coolant hoses.
13.
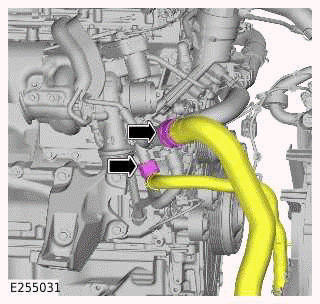
Connect the 2 engine coolant hoses.
14.
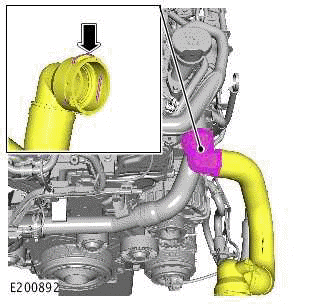
Connect the engine coolant hose.
15.
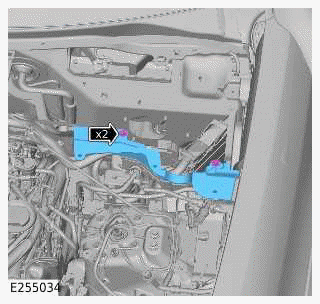
- Connect the electrical connector.
- Install the wiring harness clip.
16. Install the secondary bulkhead center panel.
17. Install the Air Conditioning (A/C) compressor.
18. Install the transmission.
19. Install the hood.
20. Connect the startup battery ground cable.
READ NEXT:
 Engine and Ancillaries - Installation
ENGINE AND ANCILLARIES - INGENIUM I4 2.0L PETROL
INSTALLATION
SPECIAL TOOL(S)
303-680
Socket, Cylinder Head Temperature Sensor
310-198
Installer, Teflon Seal
JLR-303-1630
Locking Tool, Crankshaft P
Exhaust System
Exhaust System - Ingenium I4 2.0l Petrol/Ingenium I4 2.0l Petrol - PHEV
SPECIFICATIONS
NOTE:
Numbers with a green background are a single use component.
COMPONENT TORQUE LOCATION
COMPONENT TORQUE LO
Exhaust System - Description and Operation
DESCRIPTION AND OPERATION
COMPONENT LOCATION
COMPONENT LOCATION - 1 OF 1
NOTE:
Vehicle with 5 doors is shown. Vehicle with 3 doors is similar.
Ring flange to turbocharger
Flexible coupling
Resona
SEE MORE:
Exterior lights overview
The lighting system operates automatically
depending upon the ambient lighting
conditions. The system selects the
appropriate lighting function, low beam
or Daytime Running Light (DRL), for the
conditions that the system detects. In
some circumstances, it may be necessary
for the vehicle user to man
Rear Door Window
REMOVAL AND INSTALLATION
SPECIAL TOOL(S)
501-114
Release Lever, Door Glass
REMOVAL
CAUTIONS:
Lay the window on felt covered supports. Do not stand on edge as this
can cause chips which
subsequently develop into cracks.
Protect the surrounding paintwork to avoid damage.
NOTES:
This procedur
