
Land Rover Defender: Climate Control System
DIAGNOSIS AND TESTING
PRINCIPLES OF OPERATION
For a detailed description of the Climate Control System, refer to the relevant Description and Operation section in the workshop manual.
Air Conditioning (Description and Operation), Control Components (Description and Operation).
INSPECTION AND VERIFICATION
WARNING: Servicing must be completed by personnel familiar with both vehicle system and the charging and testing equipment. All operations must be completed in a well ventilated area away from open flame and heat sources.
CAUTION: Diagnosis by substitution from a donor vehicle is NOT acceptable. Substitution of control modules does not guarantee confirmation of a fault, and may also cause additional faults in the vehicle being tested and/or the donor vehicle.
NOTES:
- If a control module or a component is at fault or may be at fault and the vehicle remains under manufacturer warranty, refer to the Warranty Policy and Procedures manual, or determine if any prior approval program is in operation, prior to the installation of a new module/component.
- When performing voltage or resistance tests, always use a digital multimeter that has the resolution ability to view 3 decimal places. For example, on the 2 volts range can measure 1mV or 2 K Ohm range can measure 1 Ohm. When testing resistance always take the resistance of the digital multimeter leads into account.
- Check and rectify basic faults before beginning diagnostic routines involving pinpoint tests.
- Verify the customer concern
- Visually inspect for obvious signs of damage and system integrity
Visual Inspection
- If an obvious cause for an observed or reported concern is found, correct the cause (if possible) before proceeding to the next step
- If the cause is not visually evident, verify the symptom and refer to the Symptom Chart, alternatively check for Diagnostic Trouble Code(s) and refer to the Diagnostic Trouble Code(s) (DTC) Index
- Check JLR claims submission system for open campaigns. Refer to the corresponding bulletins and SSMs which may be valid for the specific customer complaint and complete the recommendations as required.
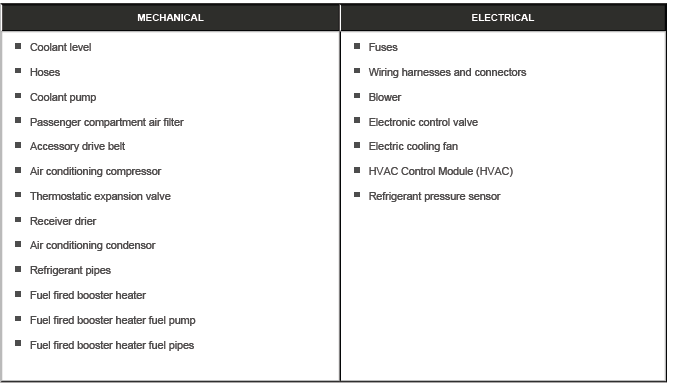
AIR CONDITIONING SYSTEM

- Low Pressure (LP) VAPOR
- High Pressure (HP) VAPOR
- HP LIQUID
- LP VAPOR
- Thermostatic Expansion Valve (TXV)
- Evaporator
- Blower
- Internal Heat Exchanger (If installed)
- HP servicing connection
- Refrigerant pressure sensor
- Electric cooling fan
- Air conditioning receiver drier
- Air conditioning condensor
- Air conditioning compressor
- LP servicing connection
AIR CONDITIONING SYSTEM SPECIFICATIONS
For the correct air conditioning system specifications for the vehicle REFER to: Specifications (Climate Control System - General Information, Specifications).
AIR CONDITIONING SYSTEM PERFORMANCE CHECK
NOTES:
- Normal pressures for a correctly charged and working system are 1.0 bar to 2.0 bar (low pressure system) and 11.0 bar to 15.0 bar (high pressure system).
- Make sure the air conditioning settings are as follows before
performing the steps below:
- Set the system to recirculate. Set the left and right side temperature to low and blower direction to face and feet.
- Set fan speeds to max.
- Make sure all doors, windows and tailgate are closed.
- Make sure all vents are open, with no objects blocking the vent exits.
- Make sure that there is no debris in the air conditioning charging ports before connecting the air conditioning station.
When a failure symptom has been reproduced, refer to the symptom chart. After completing a repair, the air conditioning performance check should be repeated to confirm that the repair is successful.
- Connect the air conditioning station to the vehicle charging ports
- Close the valves on the air conditioning station
- Check the standing pressures of the air conditioning system. The system should not have been run for 20- 30mins
- Close all doors, windows and tailgate
- Start the engine
- Set the temperature to the lowest setting (all zones)
- Set the blower speed to maximum
- Set the recirculate switch to on
- Set the air conditioning to on and check that the air conditioning compressor clutch engages and that the gauges register a change in pressure
- Raise engine speed to 1500rpm and maintain this speed for 5 minutes
- Check the pressure gauge readings

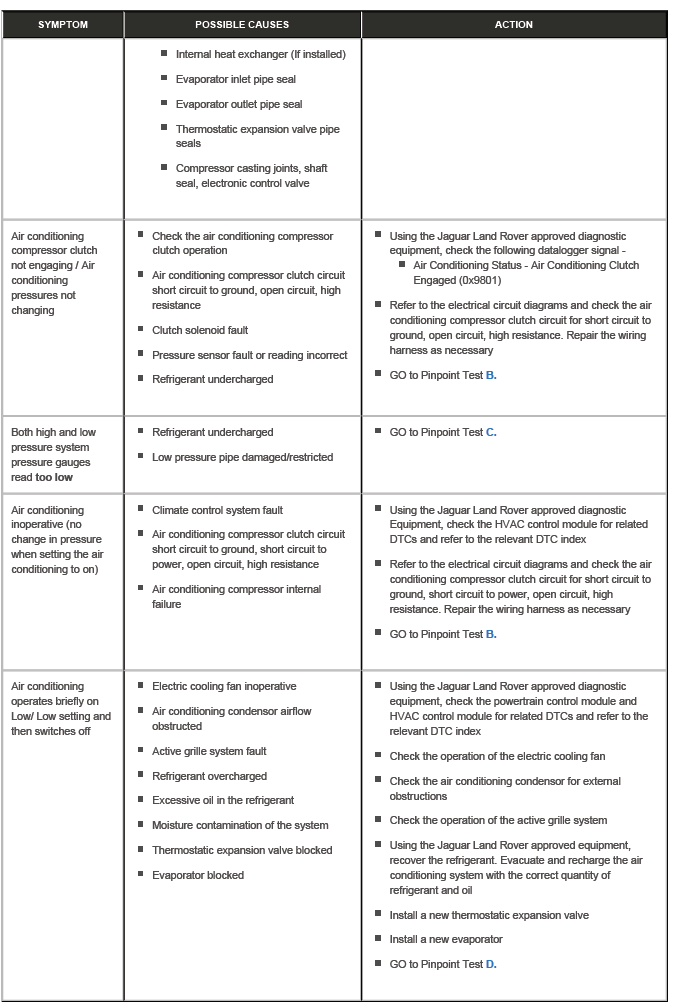
SYMPTOM CHART

.png)
.png)
PINPOINT TESTS
PINPOINT TEST A : LEAK TESTS
.png)
.png)
.png)
.png)
.png)
.png)
.png)
.png)
.png)
.png)
.png)
PINPOINT TEST B : COMPRESSOR MECHANICAL TESTS
.png)
.png)
PINPOINT TEST C : HIGH AND LOW PRESSURE SYSTEM PRESSURE GAUGES READING TOO LOW TESTS
.png)
.png)
PINPOINT TEST D : AIR CONDITIONING OPERATES BRIEFLY ON LOW/LOW SETTING THEN SWITCHES OFF
.png)
.png)
PINPOINT TEST E : HIGH AND LOW PRESSURE SYSTEM PRESSURES UNSTABLE TESTS
.png)
.png)
PINPOINT TEST F : HIGH AND LOW PRESSURE SYSTEM PRESSURES TOO HIGH TESTS
.png)
.png)
.png)
PINPOINT TEST G : AIR CONDITIONING COMPRESSOR
.png)
PINPOINT TEST H : AIR CONDITIONING SYSTEM NOISE TESTS
.png)
.png)
.png)
.png)
HVAC CONTROL SYSTEM SENSOR RESISTANCE VALUES
To assist with HVAC sensor diagnosis, please refer to the table below for sensor resistances. The values indicated may vary slightly from those shown due to changes in ambient temperature
.png)
.png)
Air Conditioning system pressure table (Static)
NOTES:
- The air conditioning system pressure values in the table below are expected when the vehicle is static with the air conditioning system switched off and with refrigerant in the system either partly or fully charged
- The engine compartment and passenger compartment need to be at the same temperature as the workshop otherwise this will have an effect on the system pressure
.png)
READ NEXT:
 Air Conditioning Compressor Commissioning
GENERAL PROCEDURES
ACTIVATION
CAUTION:
Failure to follow this instruction may result in damage to the component.
1. Set the ignition to the on position, make sure the Air Conditioning (A/C)
is in the
Climate Control
SPECIFICATIONS
Torque Specifications
COMPONENT TORQUE LOCATION
COMPONENT TORQUE LOCATION
COMPONENT TORQUE LOCATION
COMPONENT TORQUE LOCATION
COMPONENT TORQUE LOCATION
COMPONENT TORQUE LOCATI
Air Conditioning
DESCRIPTION AND OPERATION
COMPONENT LOCATION
COMPONENT LOCATION - 1 OF 2 - VEHICLES WITH AUXILIARY CLIMATE CONTROL
Auxiliary evaporator
Auxiliary climate control isolation valve and Thermostatic E
SEE MORE:
Viton
VITON
In common with many other manufacturers vehicles, some components installed
to Land Rover vehicles have seals,
'O' rings or gaskets which contain a material known as 'Viton'.
Viton is a fluoroelastomer, that is a synthetic rubber type which contains
Fluorine. Although Viton is the most well
Connecting a media device
Make sure the relevant safety warnings
and cautions have been read and
understood before driving the vehicle.
Portable media devices can be connected
to the media hub located in the front
center console.
Connect the media device into one of the
available USB sockets.
Note: Use the cable supplied w
