
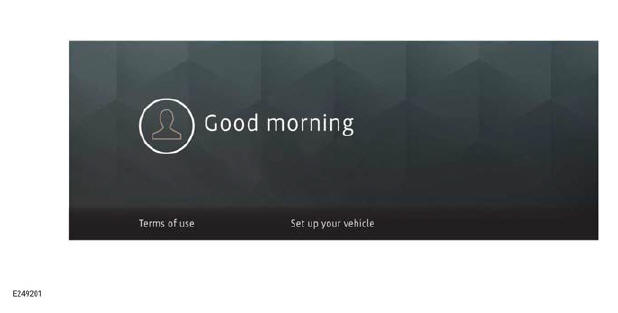
Land Rover Defender: Welcome screen

Make sure the relevant safety warnings and cautions have been read and understood before driving the vehicle.
Note: Creation of a profile can only be performed if the vehicle is stationary.
The greetings screen is displayed upon screen start-up.
If a profile has not already been created, touch Set up your vehicle. Otherwise touch the stored profile to open the home screen.
To Set up your vehicle:
1. Touch Set up your vehicle.
2. Select a language from the drop-down menu.
3. Touch Confirm.
4. A Welcome message is displayed.
Touch Get started to continue with the set-up process.
5. Create a profile name and touch Next.
6. Complete the on-screen set-up option process.
7. On profile set-up completion, touch Finish set up.
For further information on profile settings, refer to the relevant section of the Owner's Handbook.
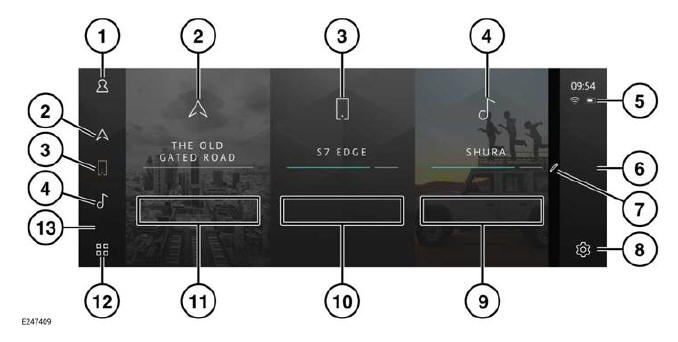
TOUCHSCREEN HOME MENU

Make sure the relevant safety warnings and cautions have been read and understood before driving the vehicle.
Note: A gloved hand may not operate the touchscreen. Remove glove(s) before selecting any touchscreen features.
- Profile icon: Touch to check for any received notifications. Notifications can only be received when the option has been activated.
- Navigation icon and tile: Touch to select the NAVIGATION assistance map.
- Phone icon and tile: Touch to select the PHONE screen.
- Media icon and tile: Touch to select the media source select screen.
- Status icons: Display the status of a vehicle feature or application.
- Passenger side bar: The passenger side bar icons displayed are dependent on the vehicle's market specification.
- Edit icon¹: Swipe the home screen to
the left or right to reveal the edit icon¹.
Touch the edit icon¹ to make changes to the home screen. The home screen can be edited to display a maximum of nine tiles. - Settings icon: Touch to select the settings screen. Select HOME SCREEN for settings. The QUICK, AUDIO and ALL soft keys are permanent options.
- Media shortcut icons: The media shortcut icons displayed are dependent on the vehicle's market specification.
- Phone shortcut icons: The phone shortcut icons displayed are dependent on the vehicle's market specification.
- Navigation shortcut icons: The navigation shortcut icons displayed are dependent on the vehicle's market specification.
- Apps icon: Touch to select the apps screen.
- Driver side bar: The driver side bar can accommodate three shortcut icons, which can be customized.
 Edit icon.¹
TOUCHSCREEN STATUS ICONS
The status icons displayed on the passenger side bar provide information about the status of the vehicle feature or application.
 Phone signal strength indicator.
 Phone battery level indicator.
 Wi-Fi signal.
 Connecting.
 Network connection status.
 No mobile network connection.
 Wireless charging.
READ NEXT:
 Driver side bar icons
Make sure the relevant safety warnings
and cautions have been read and
understood before driving the vehicle.
The following icon options may be
displayed on the driver side bar on the
touchscreen:
H
Media shortcut icons
Make sure the relevant safety warnings
and cautions have been read and
understood before driving the vehicle.
The following media shortcut icon options
may be displayed in the media pane:
Search med
Touchscreen extra features
APPS SCREEN
Make sure the relevant safety warnings
and cautions have been read and
understood before driving the vehicle.
Select the apps icon from the home
screen.
The apps screen menu gives option
SEE MORE:
Roof Opening Panel Air Deflector
REMOVAL AND INSTALLATION
REMOVAL
NOTES:
This procedure contains some variation in the illustrations depending
on the vehicle specification, but the
essential information is always correct.
This procedure contains illustrations showing certain components
removed to provide extra clarity.
1.
Hood
REMOVAL AND INSTALLATION
PART(S)
REMOVAL
CAUTION:
Care must be taken to avoid damaging the surrounding paintwork.
NOTE:
This procedure contains illustrations showing certain components
removed to provide extra clarity.
This procedure contains some variation in the illustrations depending
on
