Land Rover Defender: Locking lug nuts
Note: Not all vehicles have locking lug nuts as standard parts.

The locking lug nut adapter must be correctly aligned and fully fitted to the locking lug nut before usage. Incorrect fitment can result in permanent damage to the locking lug nut adapter. If in doubt, contact a retailer/authorized repairer.

Do not use air tools or power tools to remove or to refit the locking lug nuts.
Doing so may damage the locking lug nuts or the locking lug nut adapter.

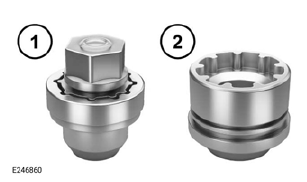
The locking lug nuts are dependent on the vehicle's specification:
- Vehicles with alloy wheels.
- Vehicles with steel wheels.

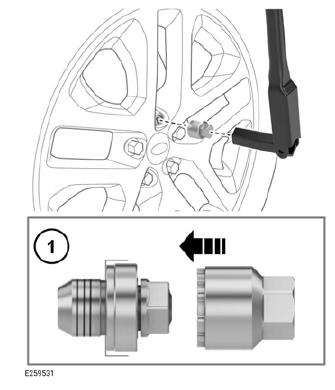
Locking lug nuts can be removed and fitted using only the special adapter provided. To release the locking lug nuts:
1. Fit the locking lug nut adapter onto the locking lug nut. Make sure that the locking lug nut adapter fully engages.

If the locking lug nut adapter is forced onto the locking lug nut, the adapter may be damaged beyond repair.
2. Locate the lug wrench over the locking lug nut adapter. Unscrew the lug nut half a turn counter-clockwise.
3. After raising the vehicle on the jack, remove the locking lug nut.
Note: When the vehicle is first supplied, the lug nut adapter may be stored in the glovebox. If this is the case, the lug nut adapter must be moved to its correct storage position in the loadspace, as soon as possible.
Note: Should a replacement locking lug nut adapter be required, consult an authorized retailer. Record the locking lug nut adapter code number in the table below to allow a replacement to be sourced, if required. Depending upon the specification of the locking lug nut adapter, the code may be stamped on the locking lug nut adapter or supplied on a separate card.


